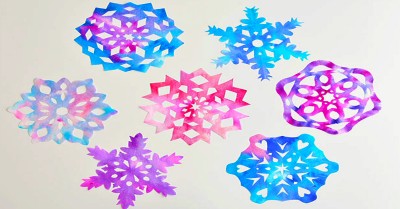
Celebrate winter with children experimenting with colour blending, with these easy to make snowflakes that can be hung around the room or stuck on a window.
Materials Needed:
- 1 coffee filter per child
- Washable markers
- Water
- An eye dropper or small measuring spoon
- scissors
What to do:
- 1. Using different colour markers, draw patterns or colour the coffee filter.
- Once completed, use an eyedropper (a small measuring spoon will also work) to drip water onto the coffee filters.
- Dry coffee filter - (either sun, overnight, or in the oven at low temperature).
- Once it is completely dry, fold them into a triangle to make a snowflake pattern.
- Next cut out the pieces from your folded coffee filters to make your snowflakes
- Gently open up the coffee filter, to see a snowflake pattern.
How To Cut Snowflakes From Coffee Filter
- Fold the coffee filter in half.
- Fold the right corner of the coffee filter to the left so that it is 1/3 of the way over.
- Fold the left corner of the coffee filter so that the edges line up on the right. (If you open it up to check, you should have perfect thirds.)
- Fold the coffee filter in half one last time.
Hints and Tips:
- Coffee filter should be wet but not soaked through.
- Cut out different patterns (hearts, circles, diamonds etc).
- Add glitter to make them sparkle before hanging.
- Hang them in the room or stick them to a window.
Reference:
Chapman, Debbie "How To Make Coffee Filter Snowflakes", One Little Project At A Time, 11 January 2019


