
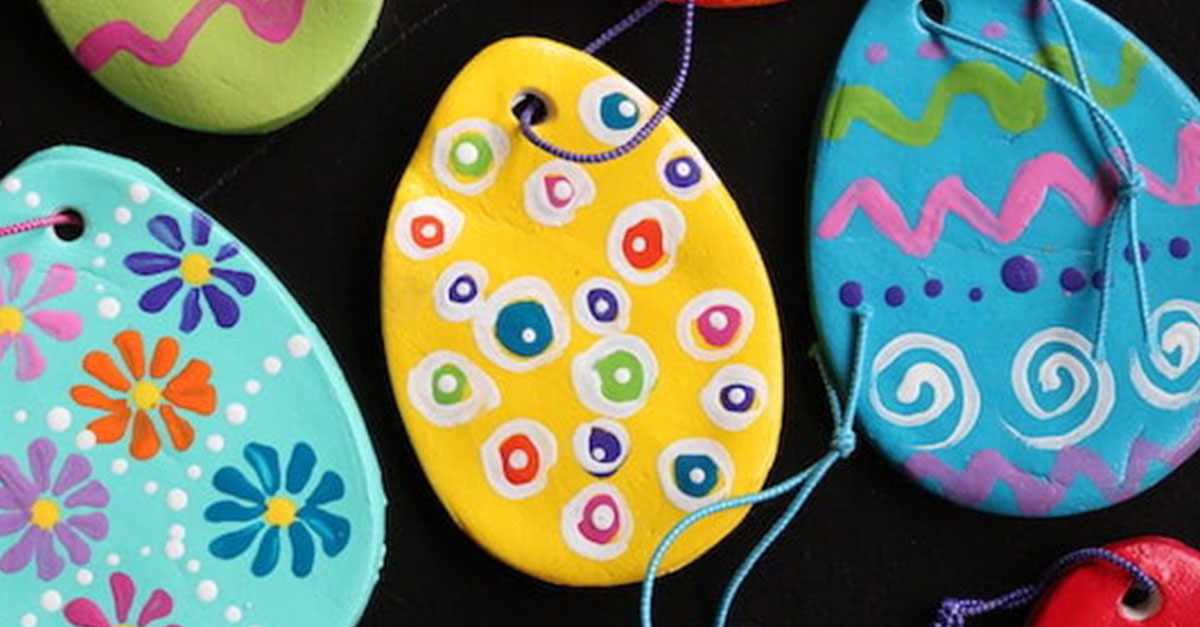
This interesting clay dough egg making art is perfect for making easter eggs that will stay with you forever. You can make anything out of this clay dough. Of course, you need to put in some extra effort to make this clay dough. And this can be done only when you have at least a couple of days’ time with you as the dough needs to dry for a day after giving them the shape. If you find the process of making the clay dough to be tedious, you can give white polymer clay a try.
Materials Needed:
- 1 cup baking soda
- ½ cup corn starch
- ¾ cup warm water
- Egg-shaped cookie cutter
- Acrylic paint and brush
- Craft varnish
- Ribbon/string
- Rolling pin
- Piercing instrument/straw
What to do:
- The first step is to prepare the white clay dough. Take the baking soda and corn starch into a bowl and mix them.
- Now add the warm water to it and stir the mixture over medium heat as it bubbles and thickens. Continue to stir until the mixture starts to leave the sides of the pan and becomes a thick cake frosting consistency.
- Remove the pot from the heat and allow the dough to cool.
- When the dough can be touched, transfer it onto the counter and knead it into a smooth ball.
- Your dough is ready.
- Give each kid a small ball and ask them to roll it out evenly.
- Now ask them to cut the dough in the egg shape using the cookie cutter.
- Make a hole with some piercing instrument or straw on the narrow portion of the egg.
- Allow these clay eggs to dry on a baking rack for almost 24 hours.
- The next day, you can take your eggs and paint them with acrylic paints in the colour of your choice.
- Once the base paint dries, you can make patterns like wavy lines, slanting lines, dots, etc. on them with the paints.
- Once the whole work dries out, you can give a coat of varnish to these eggs.
- After the varnish dries, you can thread ribbons or colourful strings through the holes in the eggs.
- Your clay easter eggs are ready.
Hints and Tips:
- Allowing the clay eggs to dry for 24 hours is mandatory. Similarly, placing them on the baking racks is also necessary as only in this way there will be enough aeration from the back portion too. Placing them on trays won’t serve the purpose.
- After the preparation of the dough, kids can be involved in the rest of the procedure.
- Applying varnish makes the colours pop up and also adds sheen to these eggs.
- Make sure you choose colours in combinations such that the eggs look bright.
- If you are making an Easter tree this would be an excellent way to decorate it.
- The smaller versions could even be used as pendants by the kids.
- You could simply hang these colourful Easter eggs in your doors or windows.
- Try making a wind catcher using by tying these easter eggs in random lengths onto a piece of bamboo.
- They make an excellent gifting option too.
Reference:
Happy Hooligans